Last year I made Christmas bunting. I used what is probably the usual method - ie laboriously cut loads of triangles, sew them together, turn inside out and then string together.
That's obviously the way to do it if you are using scraps but I realised that there is a way of sewing and cutting them which just helps to make the process a bit faster and less fiddly, if you have the luxury of yardage.
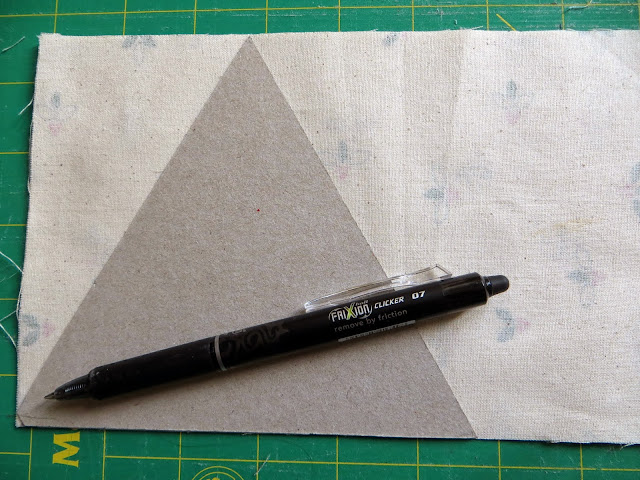
From a piece of cardboard cut a triangle template the size you want your flags to be including your seam allowances all round. You can see how I have used the angle marks on my quilting ruler to cut an equilateral triangle. Your triangle can be any kind you choose.
Now cut two strips of your material as tall as your template. (I chose a triangle size which meant I could cut four strips from a fat quarter.) Obviously they can be wider than mine if you are using a full width of fabric - having a wider strip speeds up the process further.
Place down right sides together. (Do be careful to make sure that directional fabrics are running the right way).
Now flipping your template as you go, mark off a row of triangles like this, using your favourite erasable pen - I love my Frixion pen which was in my Stitch Gathering goody bag - or even a pencil will do the trick.
 |
| Mark a triangle. |
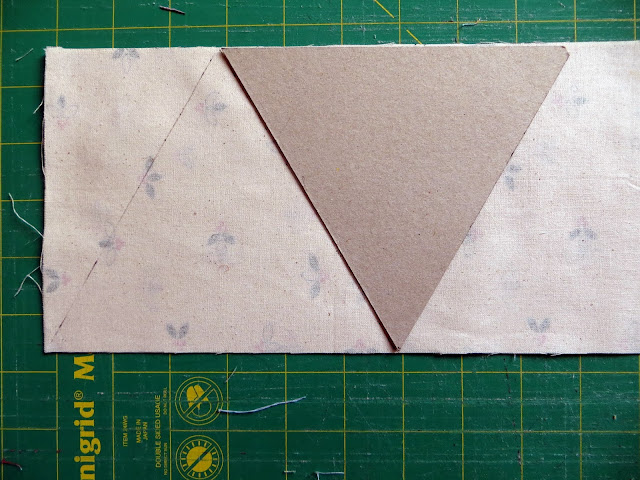 |
| Flip and mark again |
 |
| And again... |
Do this until you have gone along the length of your fabric strips.
Don't cut your triangles out yet. Instead, using your preferred seam allowance, you are going to sew seams on either side of your pencil lines. The quickest and easiest way is to zigzag up and down the triangles. Go one way first - and if you sew as in the diagram below you can stop just before you reach the edge of the fabric, drop your needle, and pivot to turn without having to take the fabric out.
When you get to the end, zigzag back the other way (shown in red)
You can now press your sewn strip to set all the seams in one go!
Now take your sewn strip, and cut along your pen marks in between your stitching - just like you do when making HSTs.
Voila! - a nice little pile of flags waiting to be turned inside out.
Snip the ends to reduce bulk and turn right side out.
I still never manage a very pointy point - if you have a good tip, please let me know.
| Do you want to make even easier and faster bunting? Just mark and sew your strips right sides out, and cut along the lines with pinking shears. |
|---|
Either way, you're now ready to insert into your folded bias binding/cotton tape/ribbon and sew along. Leave a space between the flags, or butt them up together, whichever you prefer.
All those little offcuts from the ends of your strips can be cut down and made into
mini bunting, which looks sweet wrapped round a Christmas tree.
I'm linking up to Fabric Tuesday!